

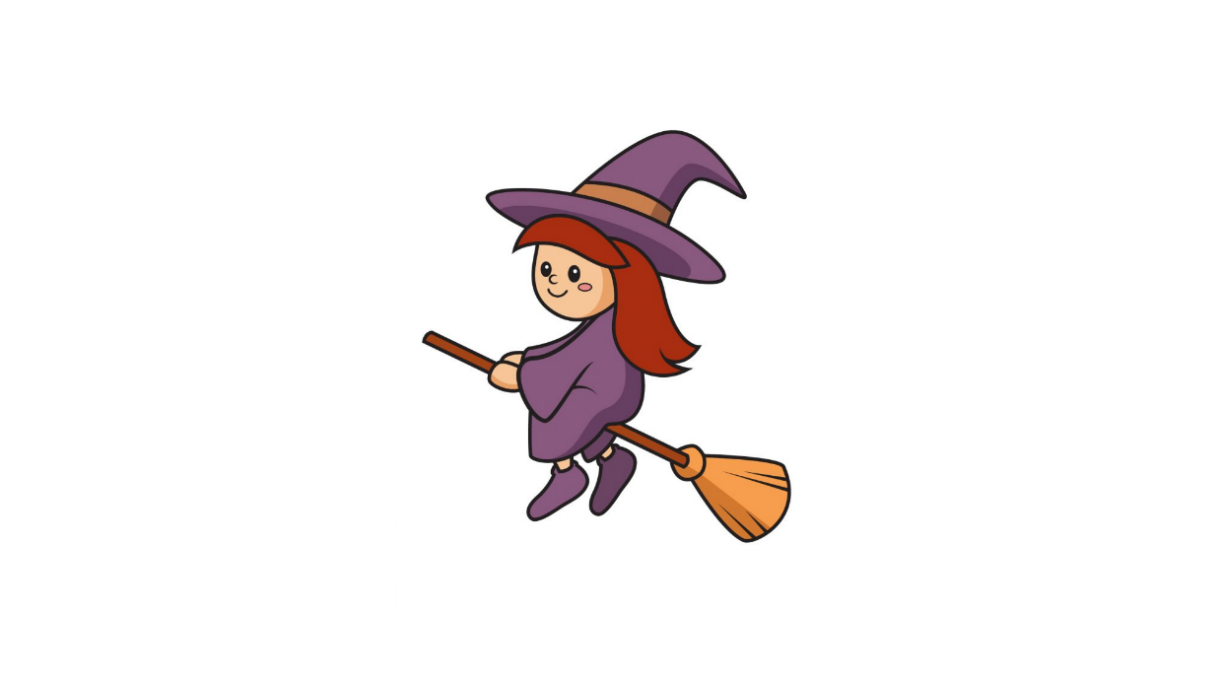

How to Draw A Witch. In folklore, the witch is a human who also practices witchcraft. Witches are believed to possess a wide range of magical powers through spells, incantations, and rituals.
Also, check our Unicorn Coloring Pages.
The allure of witches and the mystery behind their existence has created a great demand for a free witch drawing tutorial.

Well, you asked for it, so we delivered. We’ve curated a step-by-step process on how to draw a witch, summarized in 9 simple and easy steps.
So what are you waiting for? Prepare a sheet of paper and your favorite pencil so we can draw a witch together. Remember to bring your painting supplies too!
How to Draw A Witch
Step 1
Starting at the top of the paper, draw a narrow oval shape that will form the brim of the witch hat.
Drawing on paper gives enough space for the witch’s entire head and body. This will also ensure that the witch is drawn in the center.
Step 2
Witches usually wear tall, pointed hats, so we’ll draw them in this step. Just draw a triangular shape folded at the top. This creates a folded crown, which makes the hat look more natural.
Remember to point to the top of the crown – it’s one of the most distinctive features of a witch costume!
Step 3
Draw a horizontal line just above the brim of the hat.
This creates the band that goes around the crown of the hat.
Step 4
Just below the hat, draw the front of the witch’s hair.
As you can see in the illustration, we drew a curvy horizontal shape with pointed edges to create the bangs that cover the witch’s forehead.
Step 5
Draw a semicircle just below the bangs. This forms the witch’s head.
Next, draw a curved shape with pointed edges to create the witch’s hair. The hair should be connected to the bangs and the witch’s head.
As shown in the image above, we kept the witch’s hairstyle simple. Although witches are usually depicted with long, messy hair, you can style any hairstyle, whether a short pixie cut or long curly hair.
Depending on your hairstyle, you can also tie your hair in a ponytail or braid.
Step 6
Pull a long-sleeved robe under the witch’s head. Make the dress look flowy and loose as it really should be!
Next, draw a rounded shape at the hem of each sleeve that forms the hands. Next, draw a stick that connects directly to the hands. This creates the broomstick that the witch rides on.
Witches stand out when they wear an oversized tunic, so keep that in mind when designing the witch’s outfit!
Step 7
Draw a stick connected to the witch’s lower back. This forms the underside of the broom handle.
Please ensure the broomstick we drew in the previous step lines up with its underside.
Next, draw the left foot dangling under the robe.
Step 8
Draw the right foot on the opposite side. Since the witch is riding a flying boomstick, both feet should dangle in the air.
Step 9
In this final step, we’ll create the witch’s facial features to complete the look.
Starting from the top down, draw two oval shapes below the brow to create a pair of eyes.
Next, draw a half circle under the eyes for the nose. Next, draw an upward curving line under the nose to put a big smile on the witch’s face.
Add a side oval shape on both cheeks for a dramatic “blush effect”!
Remember to draw the tail branches attached to the bottom of the stick! This completes the structure of the broomstick.
Now that we’ve successfully drawn a witch, it’s time for the part we’ve all been waiting for. Finally, now we will choose the colors and color the witch.
While witches traditionally wear an all-black dress, the costume comes in various colors. This means you have many color options when coloring your design.
What colors you use for the witch is entirely up to you! After all, it’s your work of art.
Your Witch Drawing is Finished!

